PROBLEM
Sometimes you need to reprogram a Keypad ID to a new number, or a keypad needs a new label.
SOLUTION
You will need to have our Toolkit app downloaded on your computer to be able to configure the base receiver and/or the keypads.
Please contact us at support@meridia.vote to receive a link to the Toolkit app.
Keep in mind, you'll need Admin rights to run the app (it doesn't permanently install on the computer) and you may need to 'whitelist' the app in your security (i.e., anti-virus) software.
Once you have opened the Toolkit, connect to the receiver in USB or Ethernet mode. You will know that the base is connected if it is showing two blue lights on the front of the black display (on the receiver itself).
Then, navigate to the keypad tab. In the 'Set Keypad ID' menu (shown below), you may type in the field the number you wish to set as the new Keypad ID under 'New ID'. 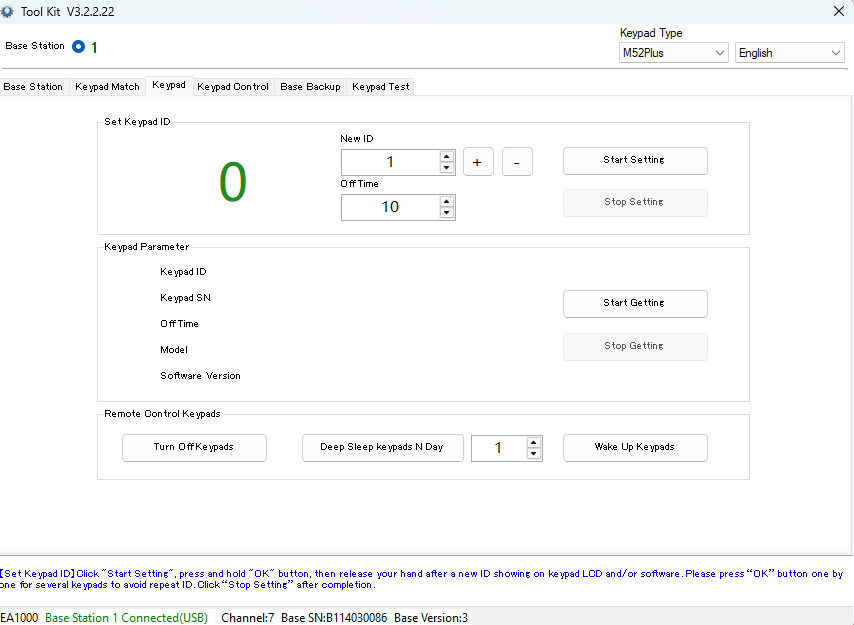
When you are ready to begin, take out your keypads and press any button to wake them up and connect to the receiver.
Select the 'Start Setting' button, and then, one keypad after another, press the Send button (paper plane icon) on the keypad to assign the desired new Keypad ID.
The Send button (paper plane) may or may not be visible because of a custom membrane design but is always located above the green '1A' or 'YES' button.
You will know a new Keypad ID has been set, when the keypad display shows an 'OK' and the number in the 'New ID' field is increased by one. Also, the new Keypad ID number should be displayed in the 'Set Keypad ID' field. Keep an eye on both the keypad display and the computer screen, because sometimes the Keypad ID assignment can skip a number or fail to assign it on the first try (button press).
Be sure to select the 'Stop Setting' option when finished.
If you are unclear which ID number is set to a specific keypad, you can use the 'Start Getting' feature in the Keypad tab. After selecting this option, press the "Send" button (paper plane) and the Toolkit app will display the Keypad ID and other information under the "Keypad Parameter" section.
This feature can be helpful if you are troubleshooting connectivity or keypad numbering issues.
When you are finished setting Keypad IDs, we recommend that you run a test.
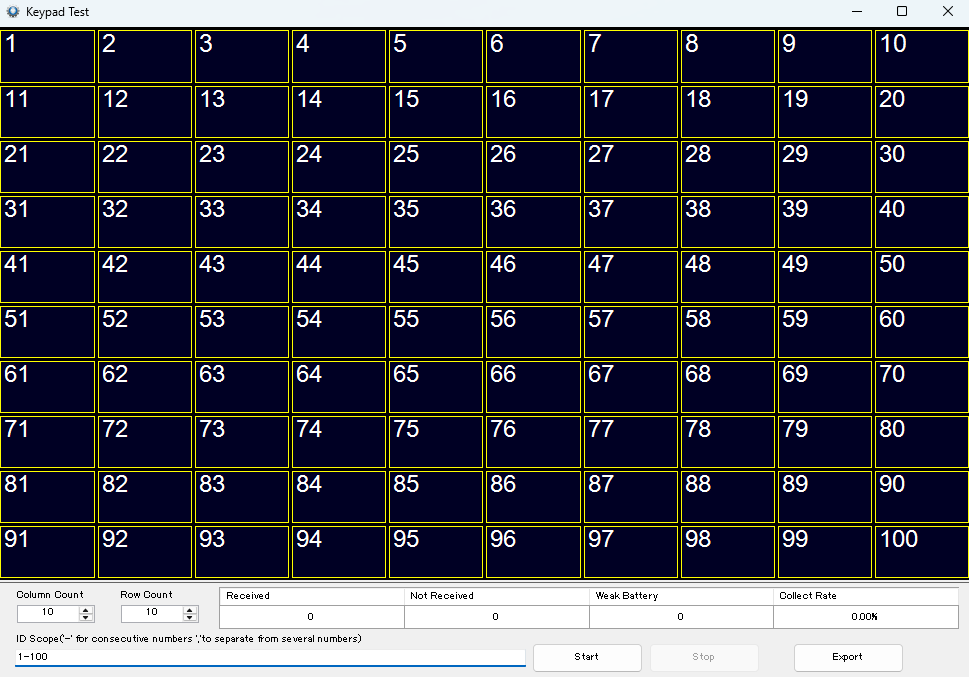
Navigate to the 'Keypad Test' tab (shown below). This opens a new, resizable window that you can maximize or resize to fit your screen. From here, you can set the 'ID Scope' and Column x Row count to set up the grid to fit your specific number of keypads.
When finished, click the Start button and as long as the keypads are 'awake', their Keypad IDs should light up green in the grid. Additionally, all keypads should show a 'T' (for "Test") on their display.
If there are some keypads that do not show green on the grid, or show 'T' on their display, wake them up by pressing any button on the keypad.
TROUBLESHOOTING
If keypads are still not showing on the grid during a test:
- Remember that keypads must not repeat/duplicate Keypad ID numbers across the group that you're using
- In other words, all must have unique IDs assigned to them
- Check if the base receiver that you plugged in is in Match Mode.
- If so, match the keypads you want to use to it, or change the mode to "Auto" (which means Open - where all keypads will work with this receiver)
- To check if the base receiver is in Match Mode, open Toolkit on the Base Station tab and check the "Working Mode" section.
KEYPAD LABELS
Once you have successfully set a new Keypad ID, you may want to label the keypads appropriately. We use rectangular sticker labels on the back of each keypad to help keep track of their numbers. More information on keypad labels can be found in this article.
YOUTUBE TUTORIAL

RELATED ARTICLES
How to Match Keypads to a Receiver
Protecting Your Keypads from Dirt and Damage
Was this article helpful? Please let us know below
Was this article helpful?
That’s Great!
Thank you for your feedback
Sorry! We couldn't be helpful
Thank you for your feedback
Feedback sent
We appreciate your effort and will try to fix the article